Before you continue reading the Tutorial, we provide support by LiveChat, Email and TeamViewer. If this Tutorial doesn’t help, get in touch with us! We want you to trust the software, so we are here to guide you along the way.
Table of Contents:
Step 1: Create an Account.
Step 2: Download the Software.
Step 3: Login to the Software.
Step 4: Software Overview.
Step 5: How to post an Ad.
Step 6: Final Reminders.
Step 1:
Initially you will need to create an account with us. This does not need to be your Kijiji Credentials. You can make an account by clicking on this link: https://postthisad.com/new-order/
Once you have created the account with us, your free trial is effective. You can post your ads with us for a week. You can decide how often you want them to repost. We recommend a 2 to 5 hour frequency.
If you will encounter any problem with your account creation, please contact us at support@postthisad.com or talk to us via LiveChat in our website.
Step 2:
Now you will need to download the software. All of your Ads will be reposted automatically from your own computer.
You can download it here: PostThisAd-4.01-win32.msi
We only support Windows and not Mac OS X. Once it is downloaded and unzipped, you can install it onto your computer.
Step 3:
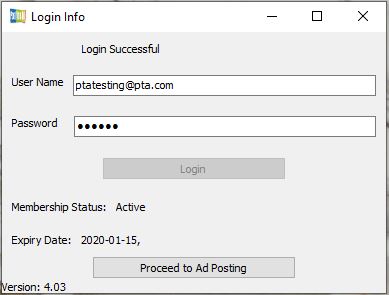
Open the software and login. You must use the same username and password you originally used to create an account with us. The software for Windows will look like this:
Step 4:
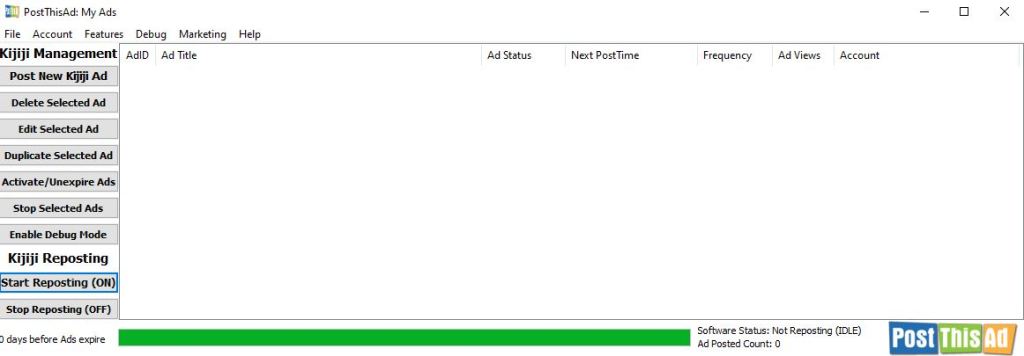
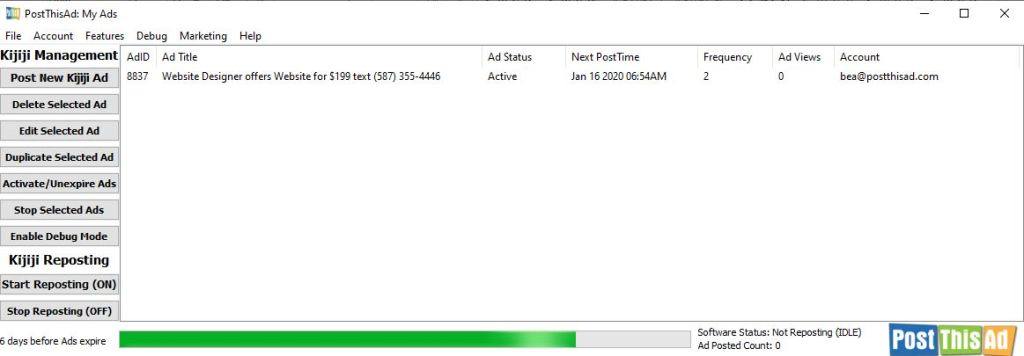
This step will mainly inform you of all the buttons and what they do. Once you click on “Proceed to Ad posting”, your page will look like this:
Left Column Buttons:
Post New Kijiji Ad: This is the button to create a new Ad.
Delete Selected Ad: This button deletes one of your Ads out of the tray. You must select an Ad, then click on Delete Ad to delete it.
Edit Selected Ad: Select an Ad and click this button to edit information. You can change things like, frequency, ad description, phone number, images etc.
Activate/ Unexpire Ad/s: This button resets the Ad status to “Active”. If your Ad expires or fails to post, you click this button to reset the status.
Stop Selected Ad: To stop an active ad, click on this button.
Enable Debug Log: You can ignore this button. If you have a problem, we will send you instructions on how to use this button.
Start Reposting: To start the reposting process, click on this button. It should turn green once it’s ON.
Step 5:
Fill up the rest of your Ads. It is recommended to have a PostThisAd folder on your desktop. Within this folder keep all your Ad Details and Ad Images. This is not necessary but it will help you stay organized.
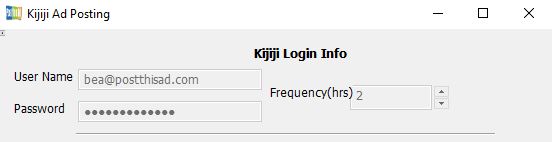
- Log in your Kijiji account and choose your frequency.
- Type the location in the software:
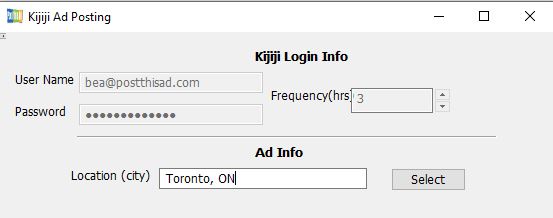
- Click on select button to choose category.
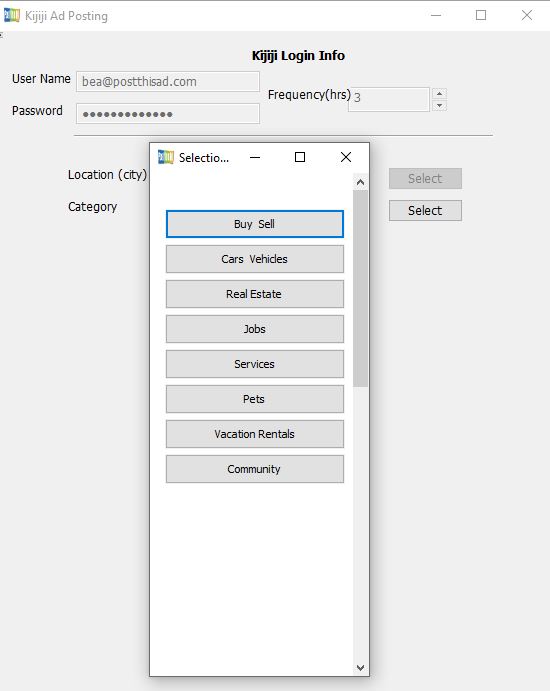
- Fill out the rest of your ad details.
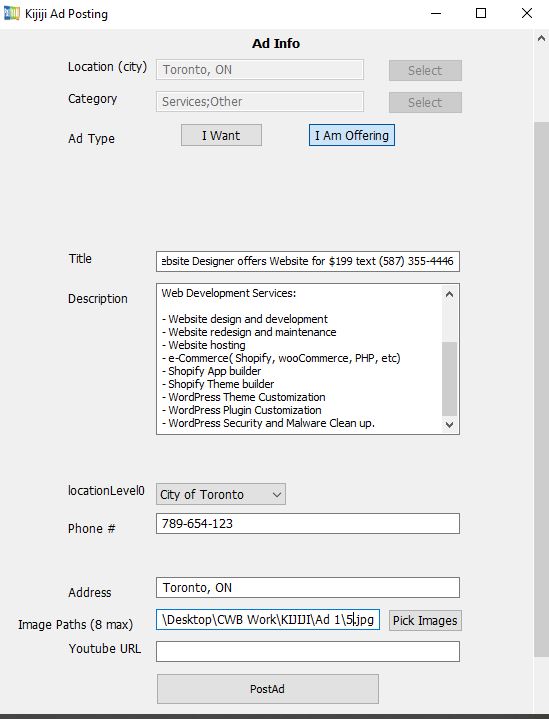
- Once all fields are filled, click on PostAd.
You will be able to see the fields on chrome window (left) automatically being populated. It’s important to know that you should not click anywhere on this chrome window on the left, it’s just for you to see that the software will automatically repost the ad.
Posting will take anywhere from 30 seconds up to 5 minutes depending on your computer.
Once it is done, the Ad will show up in your Tray.
Step 6:
This is the last step. Do not forget to activate your ad and click on Start Reposting for the software to start the reposting process. To do this, highlight the ad and select “Activate/Unexpire Ad” then click on Start Reposting.
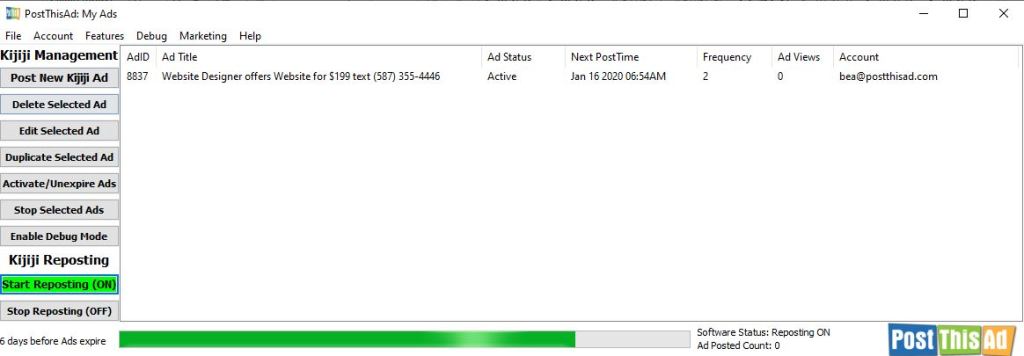
A chrome window will appear. You can minimize and let the software and chrome run in the background.
Additionally, you must keep the software open for it to post, it shouldn’t be closed. If your computer goes to sleep, all softwares stop working, including PostThisAd software. So you must configure your computer settings to avoid sleeping.
You can contact us via Email or LiveChat and we will answer any questions you may have.
Thank you!
 PostThisAd Blog